Welcome everyone! Today I’m sharing some cards that I created using the Pastillage Texture Paste from Gina K Designs (with a little help!)

VIDEO DETAILS
I have a tutorial that you can view down below or HERE on my Youtube Channel that shows the texture paste in action.
CARD DETAILS

For my first background, shown above, I started with a piece of Edible Eggplant card stock. I attached the Thick Brush stencil using the Pixie Spray low tack adhesive. This will help keep my stencil in place while I apply the mixture and won’t rip the paper when I remove it.
Working on a Tonic Craft Mat, I spread out two small piles of the Pastillage Texture Paste with a palette knife. Then I added a couple drops of Red Velvet Reinker to one pile and a couple drops of Dandelion Reinker to the second pile.
Keep in mind when adding any liquid to the texture paste, it will thin it out a bit and also lighten the color that you are using.
I mixed up the colors in each pile and then spread them over my stencil using my palette knife. Once evenly spread out, I can carefully remove the stencil.
Once dry, which I let sit for about 30 minutes, I trimmed the panel down to 3 3/4″ x 5 1/2″ and added to a white A2 size card base with craft foam for dimension. The sentiment is from the Elegant Aster stamp set which I stamped onto White card stock with Obsidian Black ink

For the second card in the video, shown above, there is a special guest appearance from my daughter, Alison, While filming the first card, she thought it looked satisfying (her exact words) and wanted to try. So, I hit record.
She will use the same method as I did except starting with Cranberry Tart card stock. She created two piles of the texture paste as I did, but this time adding Dandelion to one and then Red Velvet and Tangerine to the other pile. The Red Velvet and Tangerine were a great combination!
After she applied her mixture to create an ombre effect, she smoothed it over with the Stencil Pal from Thermoweb. This helps give even coverage of the texture paste throughout the card front.
Once dry, I trimmed the panel down to 3 3/4″ x 5″ and added to a white A2 size card base using craft foam and double sided adhesive. I die cut the words Hugs from the Hugs die set, 3 times and layered together with connect glue. I stamped the small sentiment from the Mini Hugs stamp set in Obsidian Black ink onto white card stock. I trimmed the piece down leaving just a little border around the edges and added to the card front.
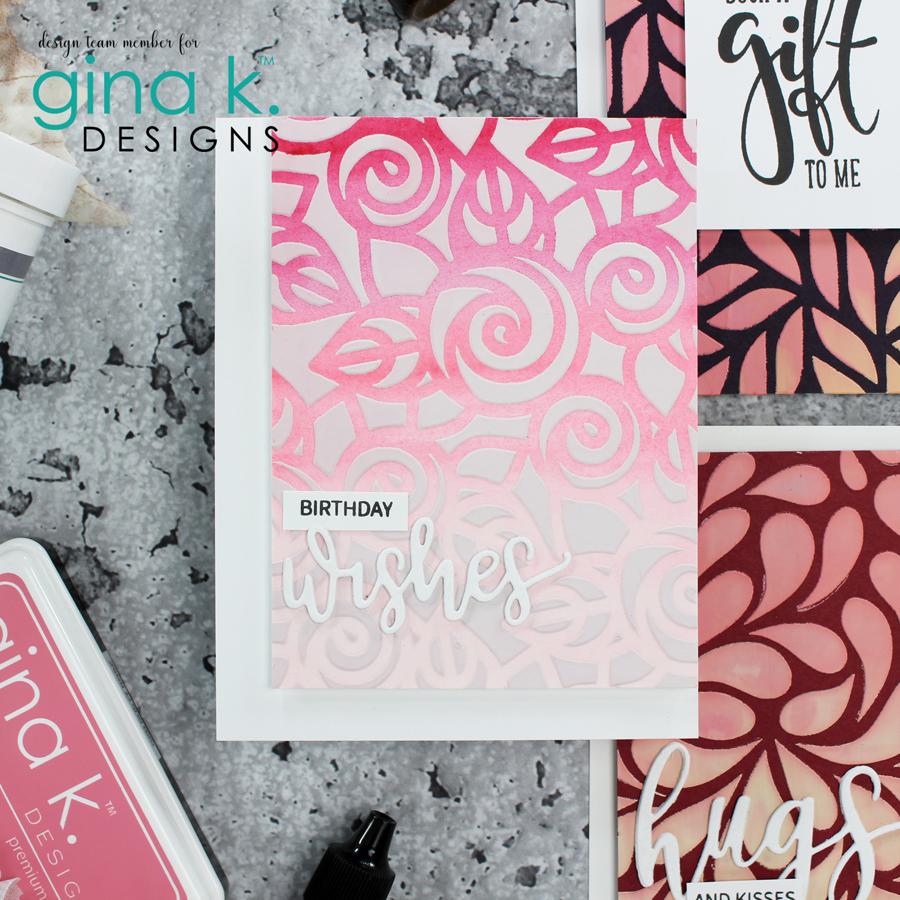
For my last card, (shown above) I used the Rose Swirl stencil on top of a watercolor background I had previously created. If you don’t have any reinkers – no worries! You can smoosh an ink pad down on your craft mat and mix with the texture paste as I did. You can also just leave the texture paste as is without adding coloring it all and it will still leave a beautiful off-white matte finish.

Once dry, I trimmed the panel down to 3 3/4″ x 5″ and added to a white card base with craft foam using double sided adhesive. Instead of placing this in the center, I added it to the top corner so it left a border on two sides.
I finished off the third card but die cutting the word Wishes three times from white card stock and layering together with Connect glue. I stamped a sentiment from the Mini Wishes stamp set in Obsidian Black ink onto white card stock. Then trimmed down into a thin strip leaving just a small white border around the word and adding to my card front.


Gorgeous cards, thank you for sharing your beautiful work x